
Stainless steel is celebrated in the industrial world for its “passive layer”—a thin, invisible film of chromium oxide that protects the metal from corrosion. However, for a metallurgist, this protector is a gatekeeper. Unlike carbon steel, where simple acids like Nital work quickly, stainless steel microstructure etching requires a more aggressive and strategic approach to break through this passive layer and reveal the crystalline truth beneath.
Understanding the internal phases—whether you are dealing with austenite, ferrite, or martensite—is critical for determining the mechanical properties and corrosion resistance of the component. In this guide, we will explore the professional techniques used to reveal these structures.
Why Stainless Steel Requires Specialized Etching
In our previous discussion about Nital vs Picral etchant, we noted that Nital is the king of carbon steel. However, if you apply Nital to a 316L stainless steel sample, you will likely see nothing but a shiny, unetched surface.
The high chromium content (at least 10.5%) makes the surface chemically inert to weak acids. To succeed in stainless steel microstructure etching, you must use reagents that contain more potent agents like hydrochloric acid, hydrofluoric acid, or utilize electrolytic methods to force the reaction.
Top Chemical Reagents for Stainless Steel
Depending on the specific grade of stainless steel (Austenitic, Ferritic, Martensitic, or Duplex), you must choose your reagent carefully.
1. Vilella’s Reagent
This is perhaps the most versatile etchant for martensitic and ferritic stainless steels. It is also excellent for revealing the structure of tool steels.
- Composition: 1g Picric acid, 5ml Hydrochloric acid (HCl), and 100ml Ethanol.
- Best for: Revealing grain boundaries and the martensitic matrix.
2. Adler’s Reagent
If you are performing a failure analysis on a weldment or a multi-phase alloy, Adler’s is your best friend.
- Best for: Differentiating between various phases in duplex steels and highlighting the Heat-Affected Zone (HAZ) in stainless welds. It provides a high-contrast finish that is perfect for digital photography.
3. Glyceregia
For the common 300-series (austenitic) stainless steels, Glyceregia is the standard.
- Composition: 15ml HCl, 10ml Glycerol, and 5ml Nitric acid.
- Note: This reagent must be mixed fresh and used immediately, as it becomes unstable over time.
Electrolytic Etching: The Gold Standard
When chemical immersion fails to give you the contrast needed for high-end software analysis, electrolytic stainless steel microstructure etching is the solution.
By applying a controlled electric current to the sample while it is submerged in an electrolyte (commonly 10% Oxalic acid), you can precisely “peel” back the passive layer.
- The Advantage: It is highly repeatable and provides exceptionally clean grain boundaries.
- Phase Detection: It is particularly effective at revealing the Sigma phase, a brittle intermetallic compound that can cause catastrophic failure in stainless components exposed to high temperatures.
Phase Identification: What Are You Looking At?
Once the etching is complete, the identification process begins. A well-prepared sample will reveal several distinct features:
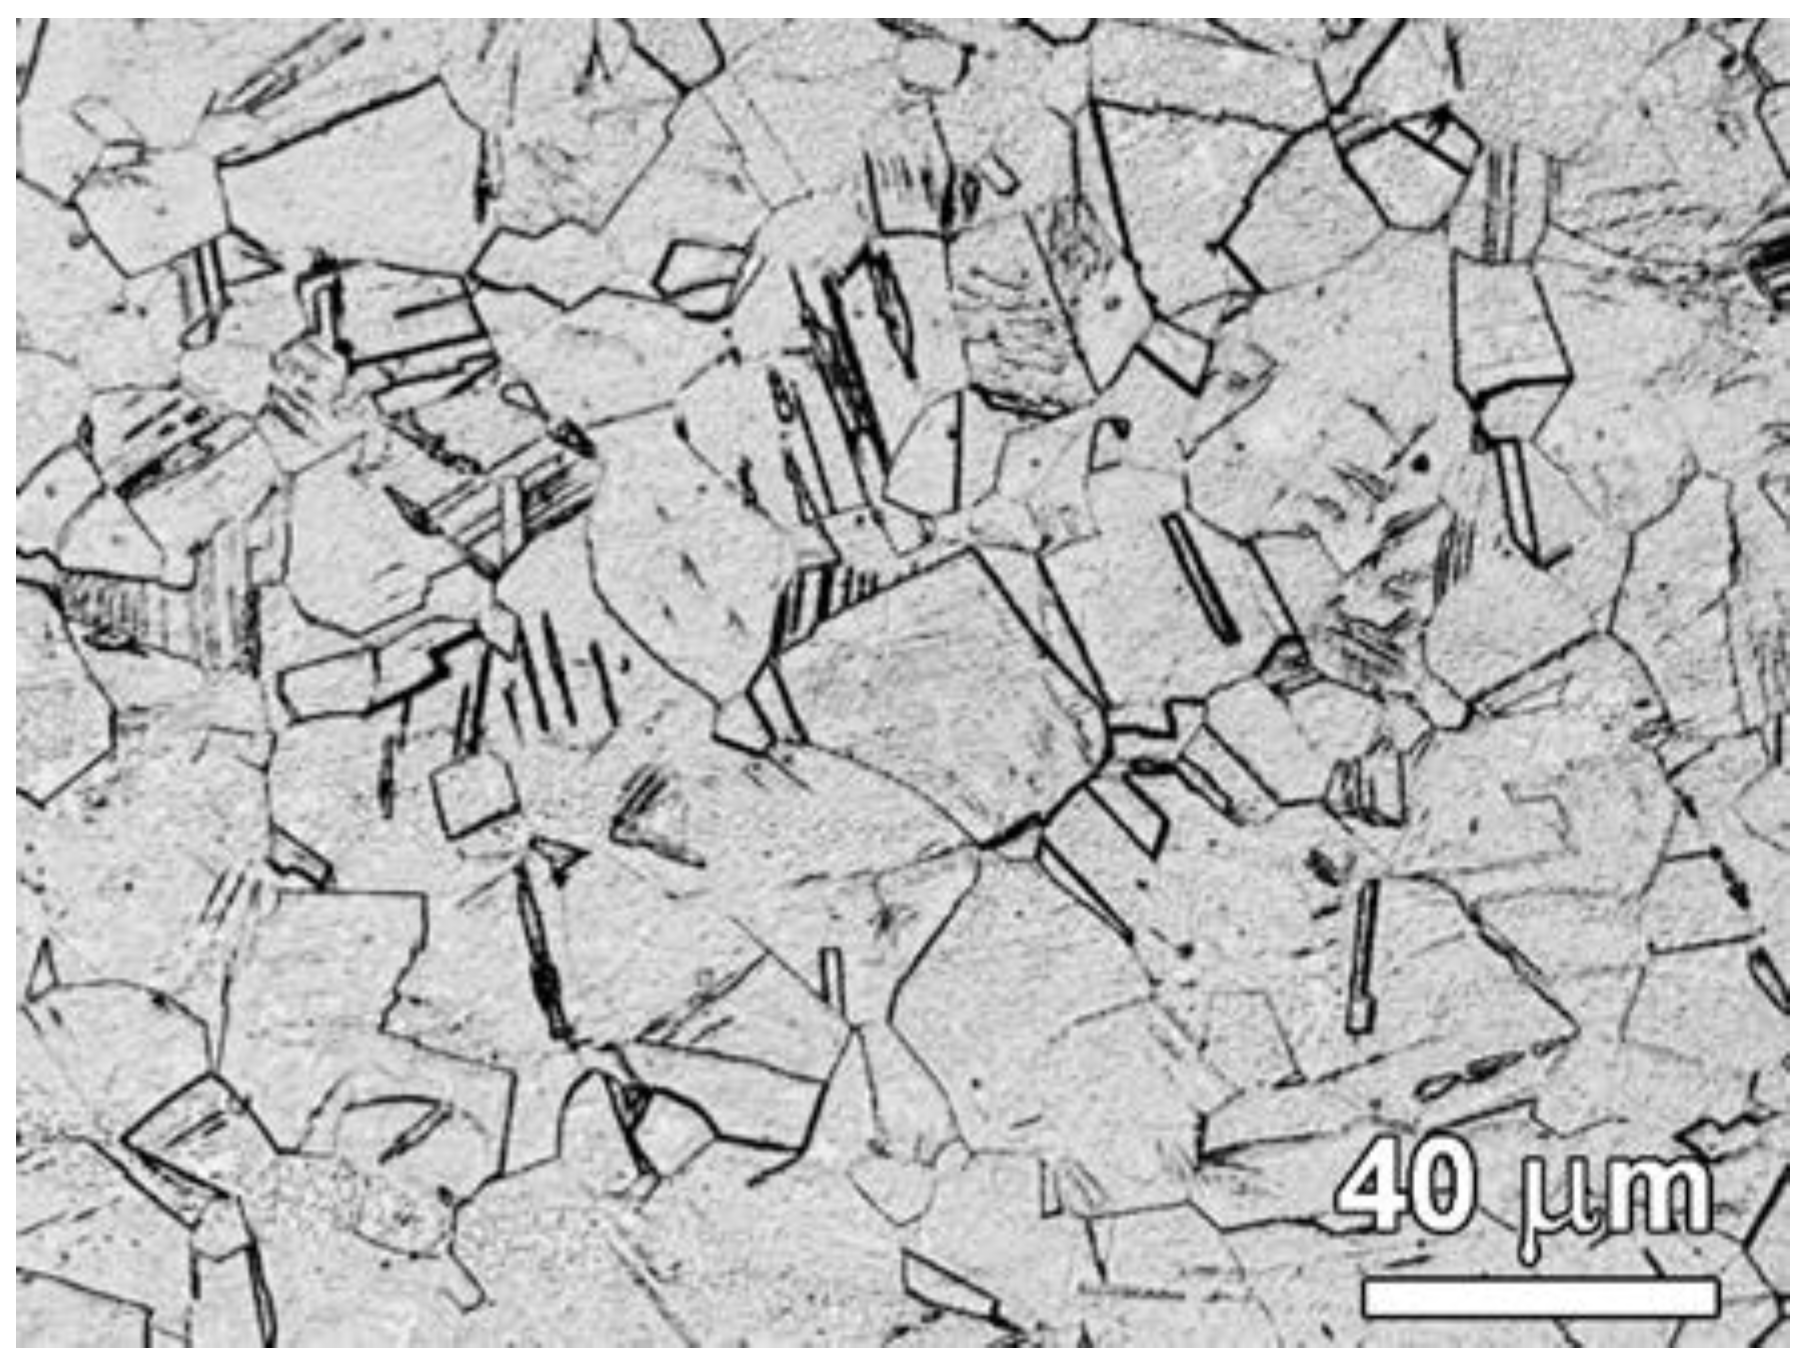
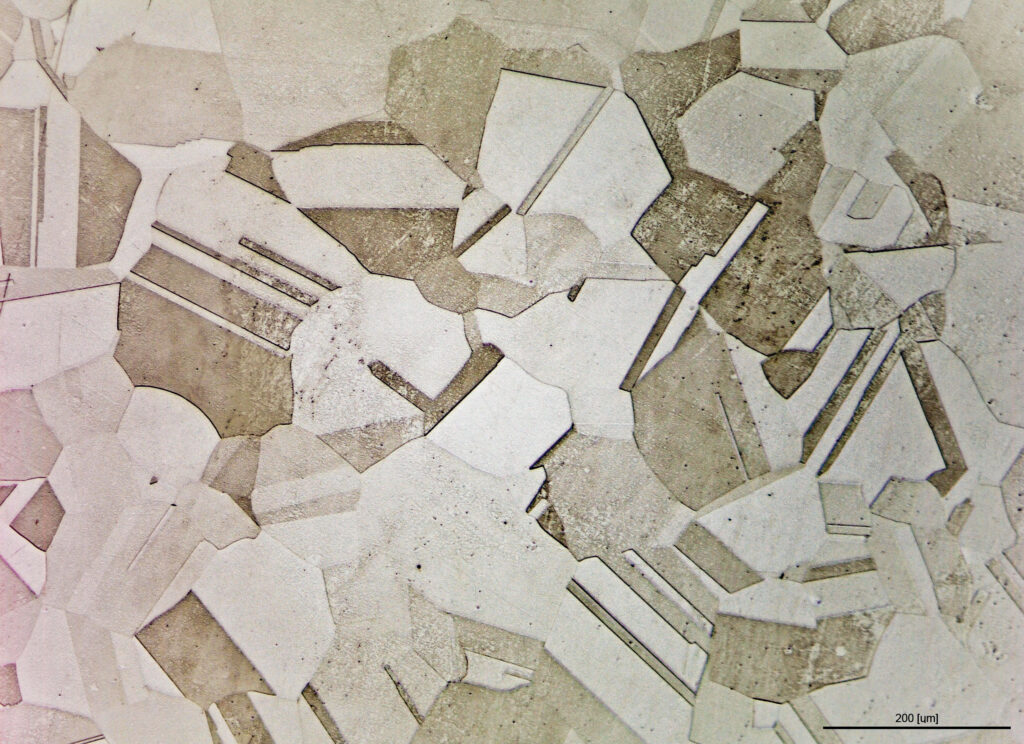
- Austenite: Appears as equiaxed grains, often showing “twinning” lines. This is the most common structure in 304 and 316 grades.
- Delta Ferrite: In austenitic welds, this often appears as a dark, skeletal, or lacy network. Managing delta ferrite is crucial—too little can lead to hot cracking, while too much reduces corrosion resistance.
- Martensite: Visible as needle-like (acicular) structures. This is common in 400-series steels that have been quenched.
| Phase | Common Appearance | Best Etchant |
| Austenite | Equiaxed grains with twins | Glyceregia / Oxalic Acid |
| Ferrite | Darker, stringer-like or lacy | Adler’s Reagent |
| Martensite | Needle-like (acicular) | Vilella’s Reagent |
Common Challenges in Stainless Steel Etching
One of the most frequent errors in stainless steel microstructure etching is “over-etching.” Because the reagents are so strong, leaving a sample in the acid for just two seconds too long can turn the surface into a black, pitted mess.
Furthermore, if the initial polishing was not perfect (down to at least 1 micron or 0.05 micron colloidal silica), the etchant will highlight scratches rather than grain boundaries. Always ensure a mirror finish before proceeding to the chemical stage.
Maximizing Results with Digital Analysis
In modern laboratories, revealing the structure is only half the task. Capturing that structure using advanced microscope software allows for automated grain size measurement and phase fraction analysis. Because stainless steel phases can often be very fine or exhibit subtle contrast, using a software suite with high dynamic range and EDOF (Extended Depth of Focus) capabilities is essential for accurate reporting.
Whether you are verifying the quality of a medical implant or analyzing a structural weldment, mastering stainless steel microstructure etching ensures that your data is grounded in visual reality.
Leave a Reply