
In the field of material science, the quality of your microscopic analysis is only as good as the surface you prepare. You can have the most expensive metallurgical microscope in the world, but if your sample is riddled with artifacts, your data will be flawed. Understanding and identifying metallographic sample preparation errors is the first step toward achieving repeatable, high-quality results.
Whether you are a seasoned metallurgist or a student, preparation “gremlins” like persistent scratches, relief, and edge rounding can obscure critical features of the microstructure. In this guide, we will break down the most common mistakes and provide actionable solutions to eliminate them.
The High Cost of Preparation Artifacts
Preparation artifacts are features on the specimen surface that are produced by the preparation process itself, rather than being part of the actual microstructure. These errors can lead to the misinterpretation of grain sizes, incorrect phase volume fractions, or missing tiny cracks that could signal a catastrophic failure.
1. Persistent Scratches and Deformation
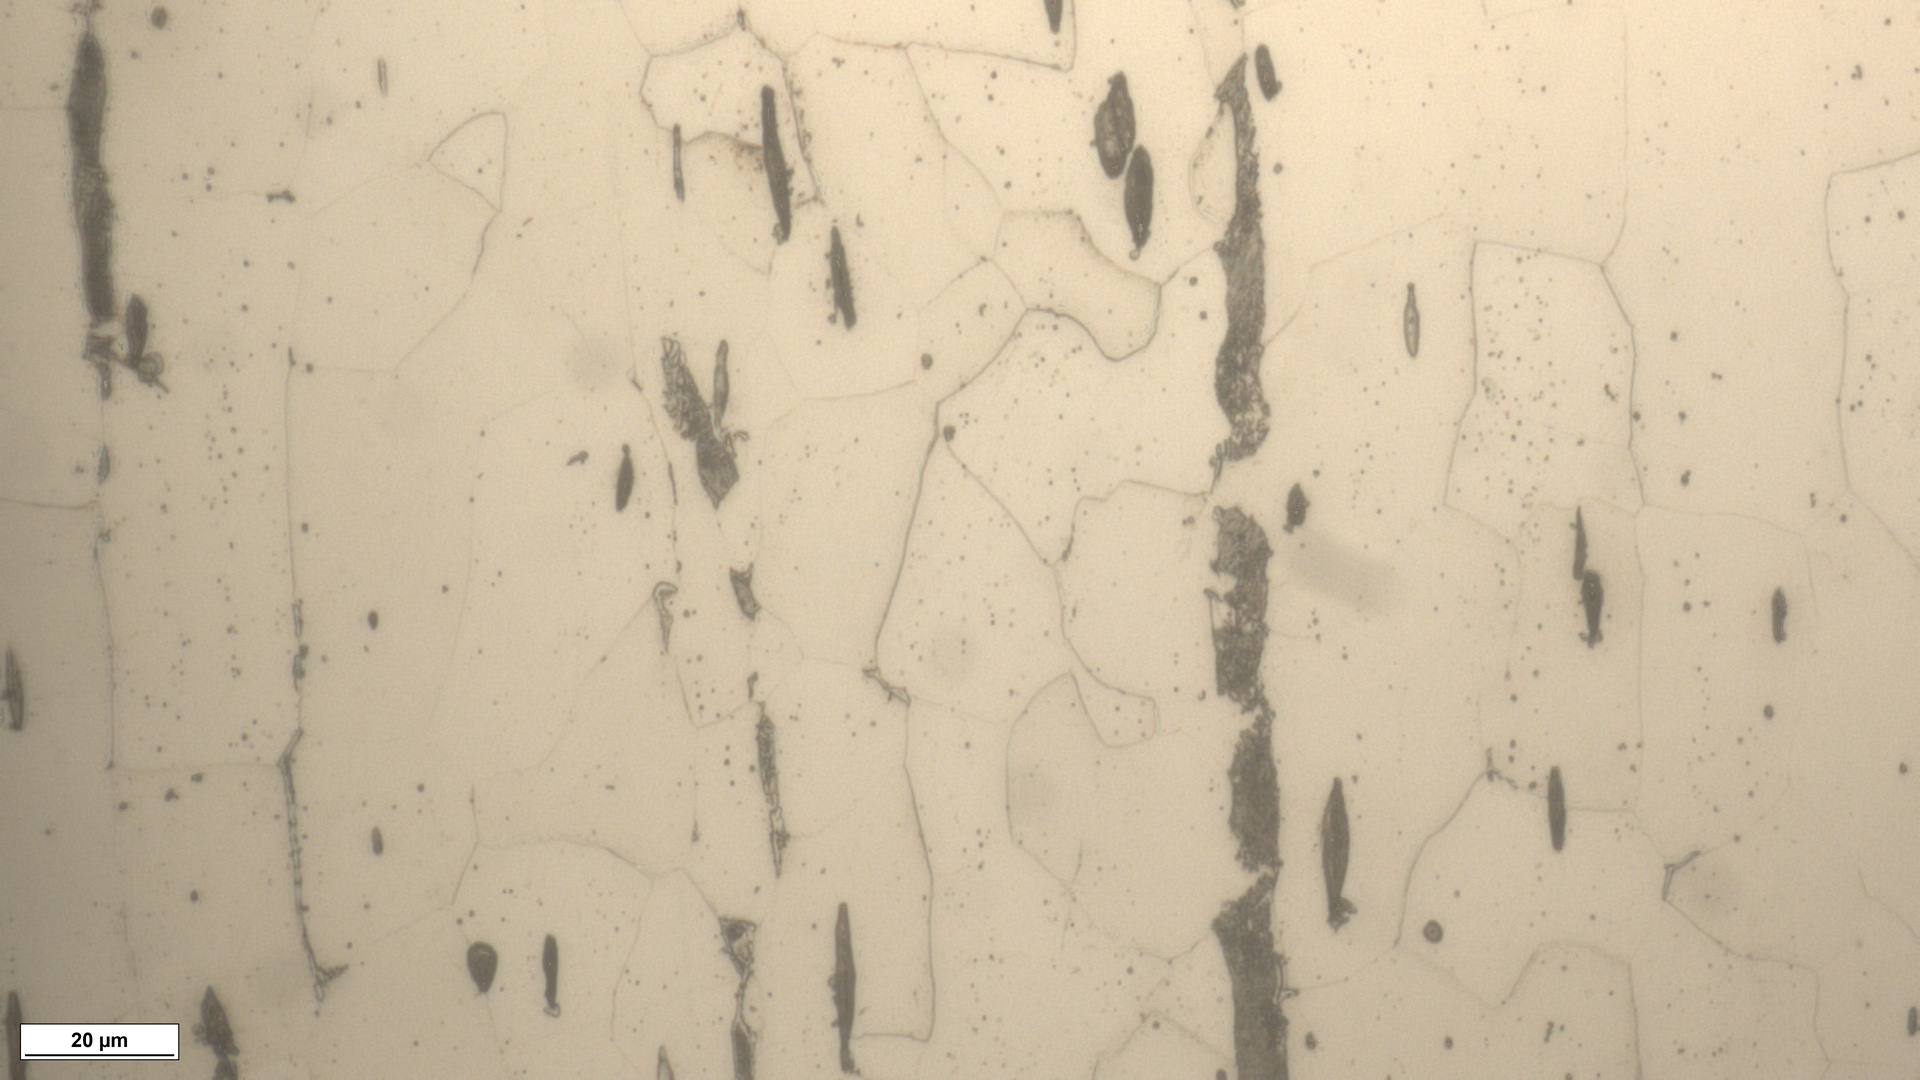
One of the most frequent metallographic sample preparation errors is the presence of residual scratches from previous grinding steps. If you see a series of deep, parallel lines that don’t match the orientation of your current polishing direction, you are likely looking at “deformation” rather than the true structure.
How to avoid it:
- The 90-Degree Rule: Always rotate your specimen 90 degrees between each grinding and polishing step. This allows you to visually confirm that the scratches from the previous, coarser grit have been completely removed.
- Cleaning is Critical: Contamination is the enemy. A single grain of 220-grit silicon carbide falling onto a 1-micron polishing cloth will ruin the entire surface. Wash your hands and the specimen thoroughly between steps.
2. Relief and Phase Interface Rounding
Relief occurs when you are working with a material that has phases of significantly different hardness (e.g., a soft aluminum matrix with hard silicon inclusions). Because the soft phase wears away faster than the hard phase, a “step” or “relief” is created between them.
This is a major problem for automated software analysis because the microscope cannot keep both phases in focus simultaneously.
How to avoid it:
- Use Low-Nap Cloths: Soft, high-nap polishing cloths act like a cushion, dipping into the soft phases and exaggerating relief. Switch to hard, napless cloths for the intermediate polishing stages.
- Control Polishing Time: Over-polishing is a common trap. Once the scratches are gone, stop. Excessive time on the wheel only increases the relief.
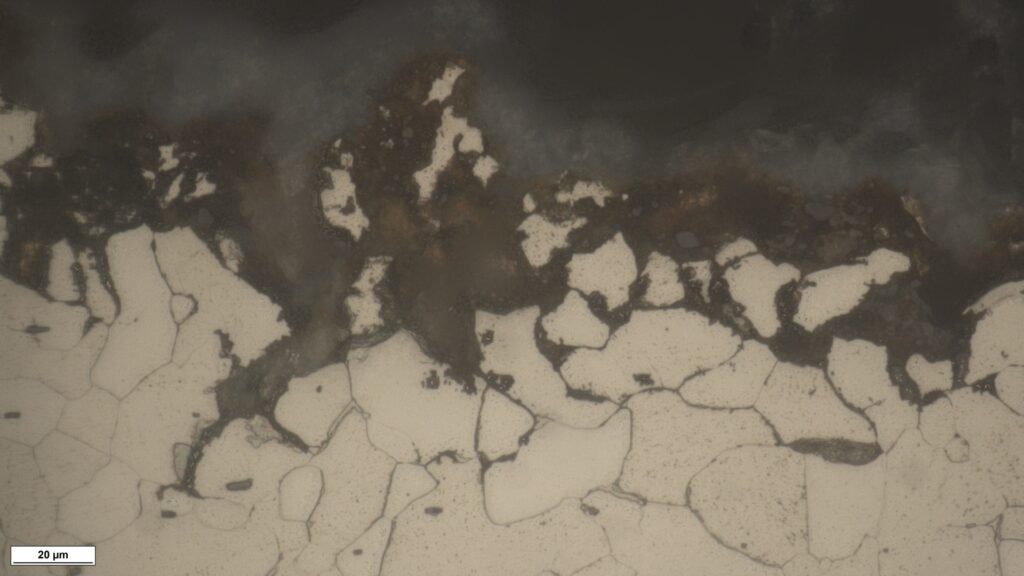
3. Edge Rounding: The Enemy of Surface Analysis
If you are analyzing a coating, a heat-treated surface, or a failure that started at the edge of a component, edge rounding is your worst nightmare. When the edges of the sample are not perfectly flat, they “roll over” during polishing, making it impossible to see the transition between the mount and the metal.
How to avoid it:
- Use the Right Mounting Media: Hard, mineral-filled epoxy resins provide much better edge support than soft acrylics.
- Add Edge Protection: For critical samples, consider using specialized steel pellets or “filler” in the mount to support the specimen edges.
4. Pull-outs and Inclusion Loss
Pull-outs occur when brittle components of the microstructure, such as graphite flakes in cast iron or non-metallic inclusions in steel, are literally ripped out of the surface during grinding. This leaves behind a dark hole that can be easily mistaken for porosity.
How to avoid it:
- Decrease the Pressure: High downward force can snag brittle phases.
- Keep the Cloth Lubricated: A dry cloth increases friction and the likelihood of pull-outs. Ensure your lubricant flow is consistent but not excessive.
The Role of Advanced Microscopy Software
Even with near-perfect preparation, some materials are naturally prone to slight relief. This is where modern digital solutions come into play. By using microscopy software with Extended Depth of Field (EDOF), you can computationally merge multiple focal planes into one perfectly sharp image. This allows you to analyze samples with minor relief without losing data on the harder or softer phases.
Conclusion
Achieving a defect-free surface is a blend of science and art. By systematically addressing metallographic sample preparation errors, you ensure that your microscopic evaluation is an accurate reflection of the material’s properties. Remember: a clean lab, a patient hand, and the right choice of consumables are the foundation of world-class metallography.
Leave a Reply