
In metallography, the distance between a perfect microstructural revelation and a misleading artifact is often measured in microns. You can have the most advanced AI-powered analysis software, such as Microvision, but if your sample preparation is flawed, your data will be too.
A “defect” in a metallographic specimen isn’t just an aesthetic issue; it can lead to incorrect grain size measurements, missed inclusions, or a complete misinterpretation of a material’s heat treatment history. Here are the five most common defects encountered in the lab and, more importantly, how to eliminate them.
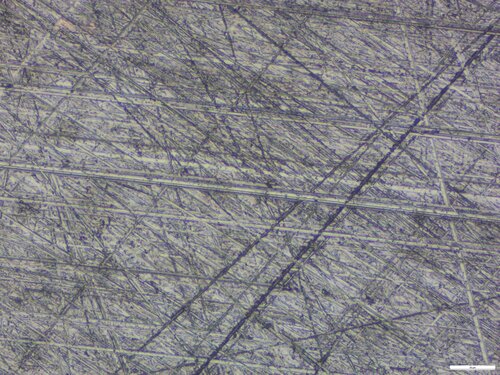
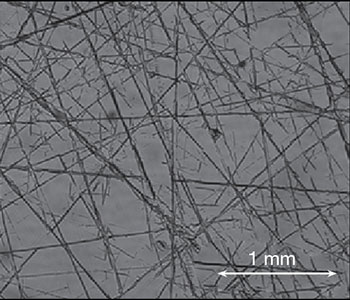
1. Residual Scratches: The “Ghost” of Grinding Past
Scratches are the most frequent headache for metallographers. They occur when the abrasive from a previous, coarser step is not completely removed by the subsequent, finer step.
- The Symptom: You reach the 1μm diamond polishing stage, but under the microscope, you see deep, oriented grooves that don’t belong there.
- The Fix: Implement the “90-degree rule.” When moving from one grinding paper to the next (e.g., from 320 to 600 grit), rotate your sample 90 degrees. This allows you to see exactly when the new, finer scratches have completely replaced the old ones. Additionally, ensure meticulous cleaning of the sample and your hands between steps to prevent “tramp” grit from contaminating the polishing cloths.
2. Surface Deformation and Smearing
Deformation occurs when the abrasive “pushes” the metal rather than cutting it. This is particularly common in soft, ductile materials like aluminum, copper, or austenitic stainless steels.
- The Symptom: After etching, the microstructure looks “blurry” or “cloudy,” and the grain boundaries are not crisp.
- The Fix: Increase lubrication and decrease the downward pressure during the final polishing stages. If smearing persists, a short “attack polishing” (adding a small amount of etchant to the polishing suspension) or vibratory polishing can help remove the thin layer of deformed metal to reveal the true structure beneath.
3. Pull-outs: When the Microstructure Disappears
Pull-outs occur when hard particles (like inclusions, carbides, or graphite flakes in cast iron) are literally ripped out of the softer matrix during grinding or polishing.
- The Symptom: Small black holes or pits where there should be a distinct phase or inclusion.
- The Fix: Avoid high-nap (fuzzy) polishing cloths. These cloths act like a “hook” that grabs and pulls at the microstructure. Instead, use hard-surface, low-nap cloths and ensure your mounting resin is hard enough to provide adequate support to the edges of these particles.
4. Edge Rounding: The Enemy of Surface Analysis
If you are analyzing surface treatments like nitriding, carburizing, or thin coatings, edge rounding is your worst enemy. It happens when the mounting resin wears away faster than the metal sample.
- The Symptom: The edge of the sample is out of focus while the center is in focus, making it impossible to measure the thickness of a surface layer.
- The Fix: Use a mounting press with a filled epoxy resin (containing glass or mineral fillers) which provides high hardness and minimal shrinkage. For extreme cases, consider “plating” the sample with a layer of nickel before mounting to provide extra edge support.
5. Over-Etching and Staining
Even with a perfect polish, the final chemical step can ruin a sample. Over-etching happens when the chemical attack is too aggressive, while staining is usually a result of poor washing or drying.
- The Symptom: The sample turns completely black (over-etching) or shows colorful, oily streaks (staining) that obscure the grains.
- The Fix: Always start with a shorter etching time than recommended—you can always etch more, but you can’t “un-etch” without re-polishing. For stains, ensure you are using high-purity ethanol for the final rinse and a high-pressure warm air dryer. Never let a sample “air dry” slowly.
Conclusion: Quality In, Quality Out
In 2026, as we move toward automated microstructure analysis, the “human touch” in sample preparation remains the foundation of accuracy. By identifying these five defects early, you save hours of re-work and ensure that your lab’s reports are beyond reproach. Remember: the microscope only shows you what you’ve prepared, not necessarily what is there.
Leave a Reply