
In the modern laboratory, your microscope viewer is the window through which the hidden world of materials is revealed, analyzed, and documented. For years, metallographers relied solely on their own eyes and the glass of the eyepiece. However, as we move through 2026, the digital interface has become the true heart of the lab. If your microscope viewer is producing blurry, low-contrast, or inconsistent images, your final reports—and your professional reputation—will suffer the consequences.
This guide is designed to move you beyond basic observation. We are diving into the technical nuances of improving image quality specifically for sharper microstructure reports, ensuring every pixel contributes to your laboratory’s bottom line.
The Digital Bottleneck: Viewer vs. Optics
A common misconception is that a high-end objective lens automatically guarantees a high-quality report. While the “glass” is the foundation, the microscope viewer is where that optical signal is digitized. If your software doesn’t correctly interpret the sensor’s data, you are losing information before the analysis even begins.
To achieve professional sharpness, you must synchronize your optical resolution with your digital display. In an industrial setting, “good enough” for a quick look is rarely good enough for an audit-ready report.
1. Mastering the Extended Depth of Field (EDF)
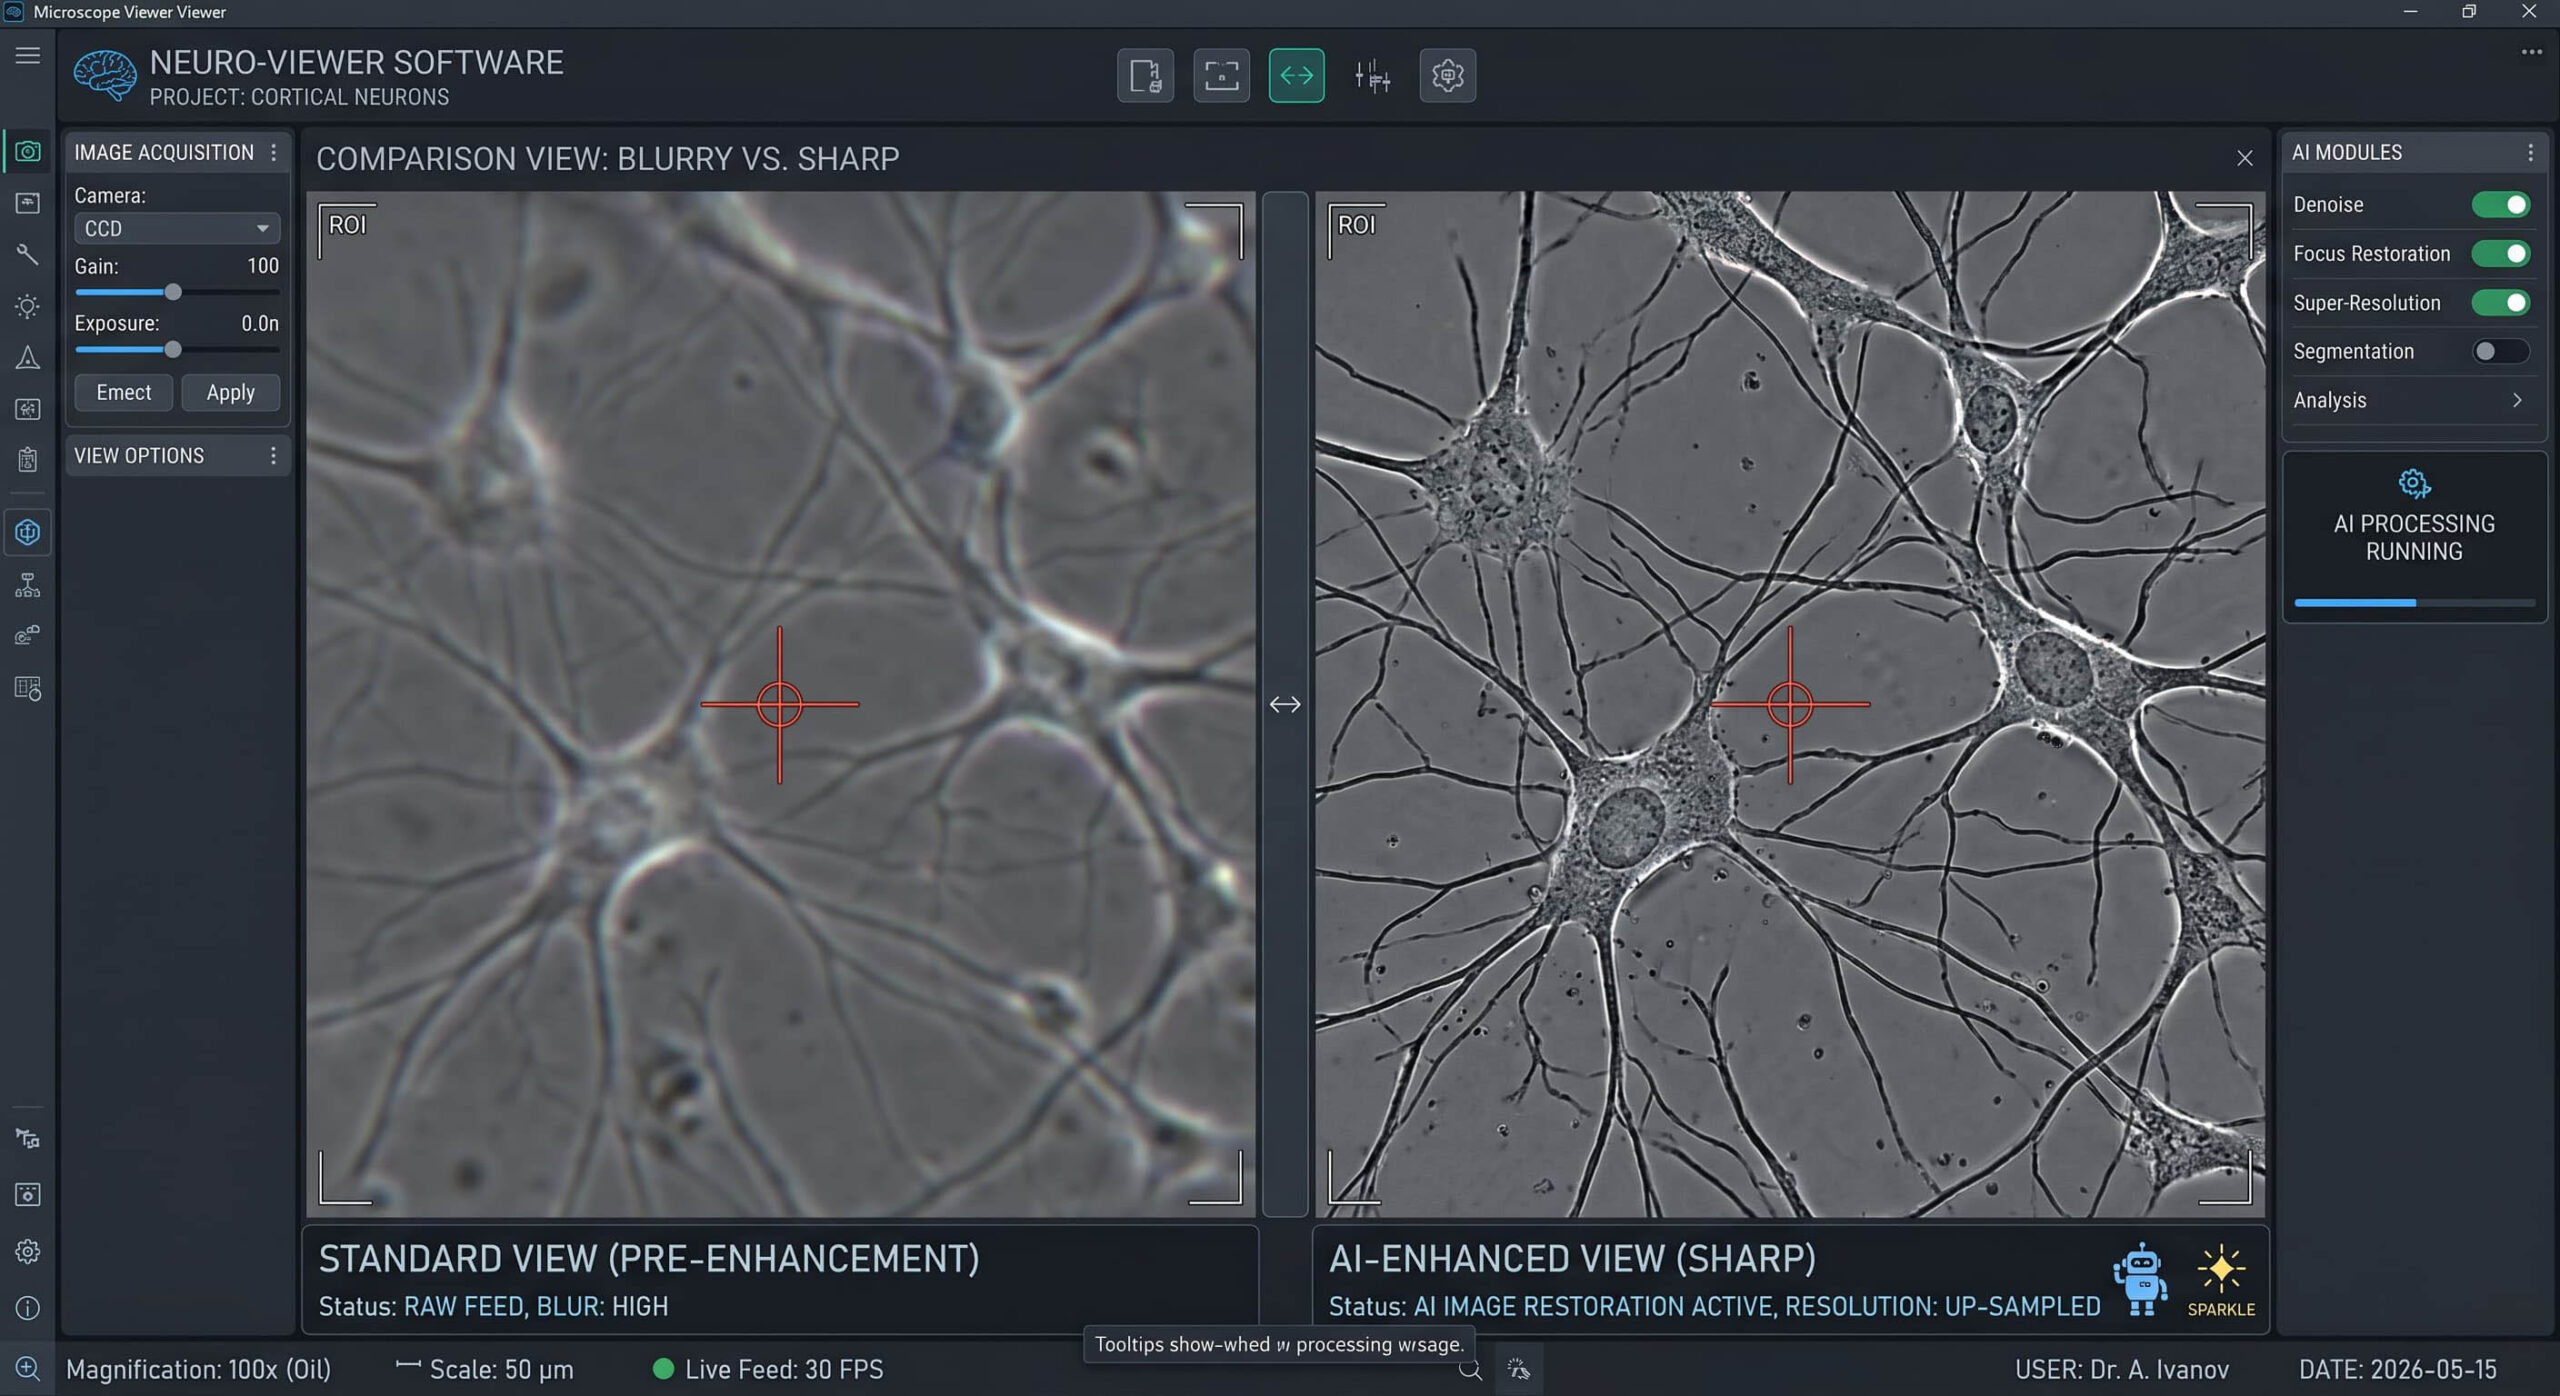
One of the biggest challenges in microstructure analysis is the shallow depth of field inherent in high-magnification lenses. When looking at unpolished fracture surfaces or deep corrosion pits, a standard microscope viewer will only show a thin “slice” of the sample in focus.
The solution is Extended Depth of Field (EDF). By using a professional suite like Microvision, you can “stack” multiple images at different focus planes. The software automatically identifies the sharpest pixels from each layer and merges them into a single, crystal-clear composite. This isn’t just about aesthetics; it is about providing the AI with the clearest possible data to perform accurate grain size or inclusion measurements.
2. The Illumination Equation
Shadows and uneven lighting are the enemies of automated analysis. If your microscope viewer shows “cloudy” areas or dark corners, your software might misinterpret these as grain boundaries or defects.
- Koehler Illumination: Always ensure your microscope is properly aligned to provide perfectly even lighting across the entire field of view.
- Color Balance: Use manual white balance settings in your microscope viewer rather than relying on “Auto.” This ensures that the color of your etchant—like the subtle differences in a Nital vs. Picral etch—is represented accurately every time.
3. AI-Powered Denoising and Sharpening
In 2026, the best microscope viewer tools utilize Deep Learning to enhance image quality in real-time. Traditional digital sharpening often creates “halos” or artifacts that can lead to false readings in ASTM E112 grain size analysis. AI-driven sharpening, however, understands the difference between a real boundary and digital noise.
By using software that “learns” the textures of metals, you can push your magnification higher without losing the crisp edges required for professional documentation.
4. Calibration: The Silent Quality Guard
You cannot report what you cannot measure. A sharp image is useless if the scale is wrong. Every time you change your magnification or your microscope viewer settings, you must verify your calibration using a certified stage micrometer. Professional suites automate this by locking the calibration to the specific objective lens, ensuring that your micron-bars are always 100% accurate in the final PDF report.
5. From Viewer to Final Report
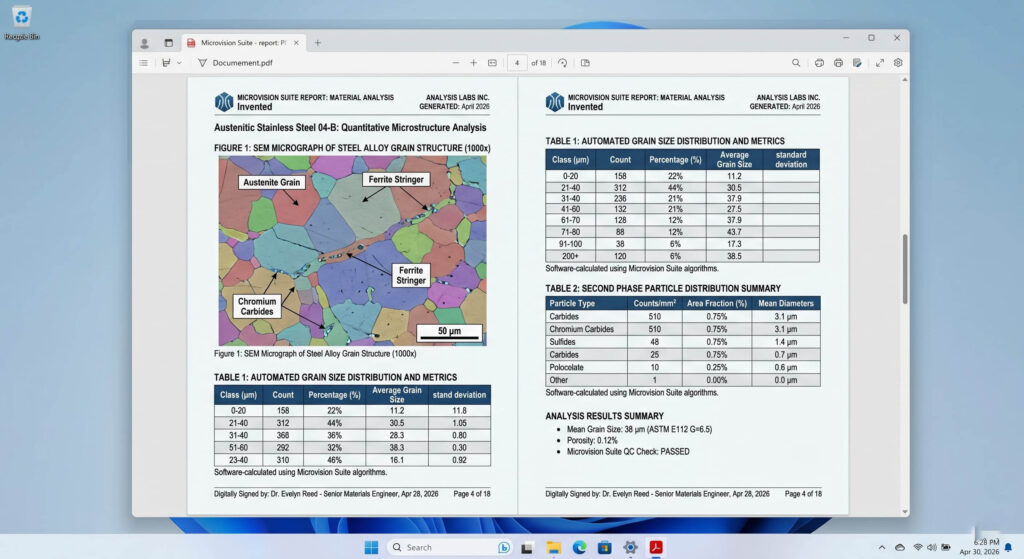
The final step in improving image quality is how you present it. A professional microstructure report shouldn’t just be a folder of JPEGs. It should be an integrated document where the high-resolution images captured by your microscope viewer are paired with histograms, data tables, and a clear audit trail.
Automated reporting tools in the Microvision Suite ensure that the sharpness you see on your screen is the same sharpness your client sees in the final report. This seamless transition reduces “man-hours” and eliminates the formatting errors that often occur when moving images manually between applications.
Conclusion: Investing in Vision
In the competitive landscape of modern metallography, your microscope viewer is more than just a screen—it is a metrology tool. By mastering lighting, utilizing EDF, and leveraging AI-powered software, you transform your lab from a place of observation into a powerhouse of precision.
Stop squinting and start analyzing. Your next ASTM-compliant report is only as sharp as the viewer you use to create it.
Leave a Reply